
Creating a Local File from the Central Model in Revit is a fundamental step in enabling effective collaboration on large-scale projects. In a multi-user environment, the Central Model acts as the main source of truth, where all project data is stored, while Local Files allow individual team members to work on their copies of the model. This setup ensures that changes are efficiently synchronised and project integrity is maintained.
In this article, you’ll explore the key concepts of Central Models and Local Files in Revit, their differences, and the steps to create a Local File from the Central Model. In addition, you will also learn how to manage Local Files in a team environment, as well as best practices to optimise your workflow in Autodesk Revit.
What is a Central Model in Revit?
A Central Model in Revit is the main file that holds all the essential information about a project—like the design, worksets, building elements, sheets and other project details. It’s used when a team of people needs to work on the same project at the same time.
This Central Model is saved in a shared place, such as a network drive or cloud platform like ACC, so that everyone associated with the project can access it. Each person works on their own Local File, which is a copy of the Central Model. This lets them make changes without interfering with each other.
When users are ready, they sync their changes back to the Central Model. Revit keeps track of who changed what and updates the main file. This setup helps the team work together smoothly, protects the data, and prevents anyone from accidentally overwriting someone else’s work.
Purpose of the Central Model in Revit
The Central Model in Revit is the main file storing all project information. Its main purpose is to let multiple people work on the same project at the same time.
This makes sure everyone is working with the latest version of the project, which helps avoid mistakes or lost data. Each person works on their own Local File, and when they save their changes, the Central Model updates with those changes.
This setup is called worksharing, and it lets team members work on different parts of the project—like architecture, structure, or MEP-F—without getting in each other’s way.
By keeping everything organised and up to date, the Central Model makes teamwork easier, speeds up the workflow, and helps the whole team stay on the same page.
Key Characteristics of a Central Model in Revit
The Central Model in Revit is made to help teams work together on the same project. It’s the main file where all the project data is stored and managed.
One of its key features is that it acts as the single source of truth, meaning everyone sees and works with the most up-to-date version of the project.
It also supports worksharing, which means different team members can work on various parts of the model at the same time—without overwriting each other’s work. This makes teamwork easier, faster, and more organised.
The key characteristics of a Central Model in Revit are as follows:
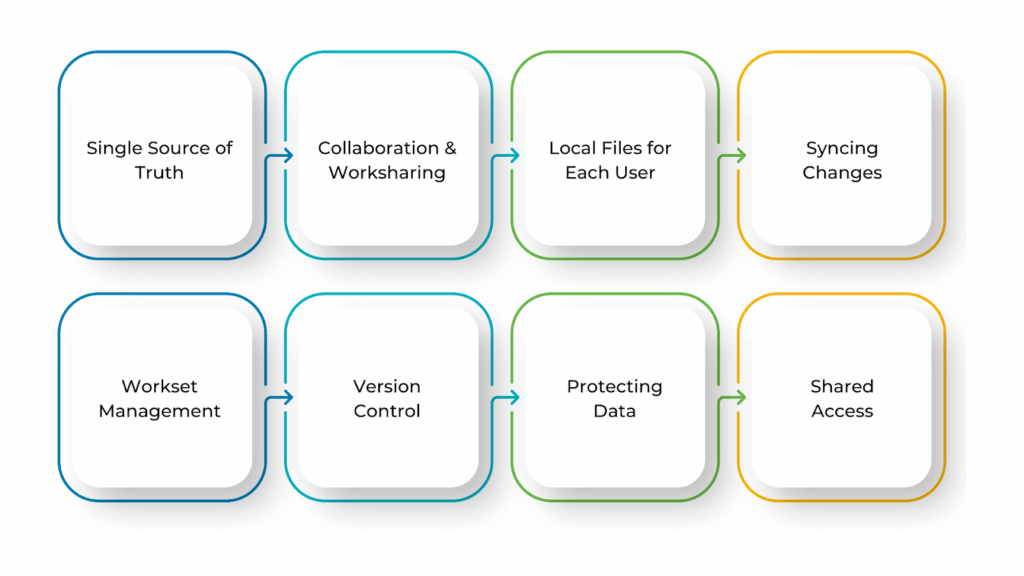
- Single Source of Truth: The Central Model is the main file where all project data is stored and kept up to date. Everyone works from this reliable version.
- Collaboration & Worksharing: It allows multiple team members to work on different parts of the project at the same time without messing up each other’s work.
- Local Files for Each User: Each person works on their own Local File, which is a copy of the Central Model. This helps them make progress individually while staying connected to the main project.
- Syncing Changes: When users are ready, they sync their changes back to the Central Model. This combines everyone’s updates into one complete, updated file.
- Workset Management: The Central Model uses worksets to break the project into smaller sections. This helps team members focus on specific areas and coordinate better.
- Version Control: Revit keeps track of who changed what and when. This version of history helps manage the project and keeps everything organised.
- Protecting Data: By constantly working with the latest updates, the Central Model helps prevent mistakes, conflicts, or data loss.
- Shared Access: The Central Model is saved in a shared location—like a network folder or the cloud—so the whole team can access and update the project from anywhere.
Once the Central Model is the main coordination point, the next workflow piece involves how each team member accesses and works on that model individually.
What is a Local File in Revit?
A Local File in Revit is a personal copy of the Central Model that each team member works on. When someone opens the Central Model, Revit automatically creates a Local File on their computer.
This Local File stores the changes they make during their work session. Instead of working directly on the Central Model, users edit their Local File, which helps protect the main file and reduces the chance of conflicts or data loss.
Users can manage their worksets, save progress, and work smoothly on their part of the project. Every so often, they sync their Local File with the Central Model. This updates the main file with their changes and brings in any updates made by others.
This setup improves performance and helps the whole team stay connected and coordinated while working on the same project. Understanding what a Local File is what lays the foundation for how Revit supports collaborative work.
Benefits of Working With a Local File in Revit
Working with a Local File in Revit has many benefits that help both individuals and teams work better. Each user gets their copy of the project to work on, which makes the software run faster and puts less pressure on the system. This means a smoother and more responsive experience.
Local Files also let users work offline, so they can keep progressing even without a constant connection to the Central Model.
When users are ready, they sync their changes back to the Central Model. This keeps everything up to date, avoids data conflicts, and ensures the whole team is working with the project’s latest version.
Below are the key benefits of working with a Local File in Revit:
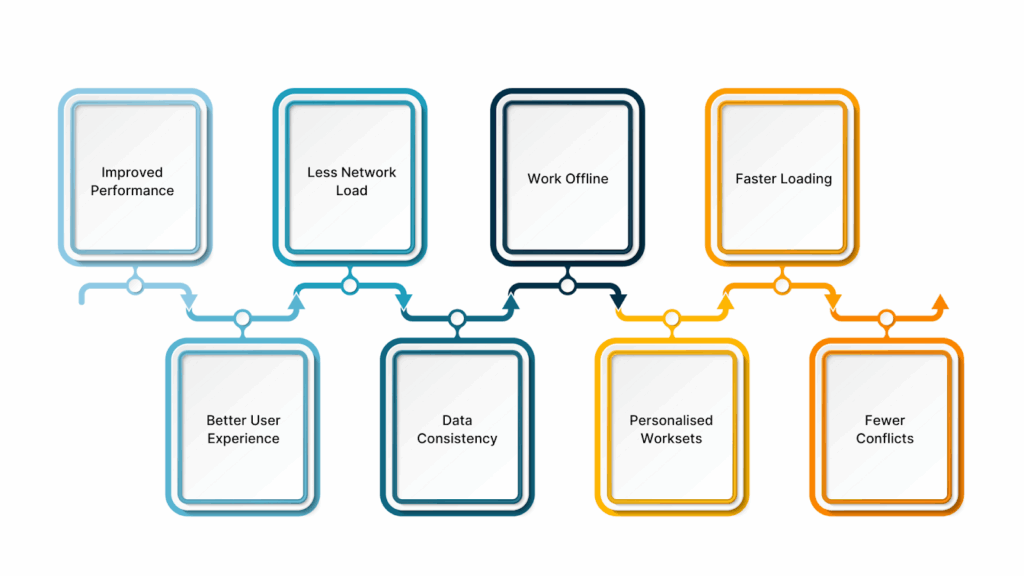
- Improved Performance: Local Files store temporary data on your computer, making the project open faster and more smoothly.
- Less Network Load: Since changes are saved locally and only synced when needed, the amount of data sent over the network is reduced.
- Work Offline: You can keep working on your Local File even without an internet connection. Once you’re back online, you can sync your updates to the Central Model.
- Faster Loading: Local Files open quicker than the Central Model because they only include the data you need, not the entire project.
- Better User Experience: Working in your Local File means fewer interruptions from changes made by others, so you can stay focused and work more efficiently.
- Data Consistency: When you sync your Local File, your changes are added to the Central Model, keeping the project consistent for everyone.
- Personalised Worksets: You can manage your worksets in the Local File, which helps you stay organised and focus on your specific tasks.
- Fewer Conflicts: Since everyone works in their own Local File, there’s less chance of overwriting someone else’s work when syncing to the Central Model.
While the benefits of using a Local File highlight its importance in a collaborative environment, it’s also helpful to understand how it differs from the Central Model.
Also read: 11 Steps to Create Revit Dynamo Scripts for Beginners.
Difference Between a Local File and a Central Model in Revit
The Central Model and the Local File in Revit have different roles when working on a team project.
Users make changes in their Local File, and when they are ready, they sync those updates back to the Central Model. This setup helps improve performance, reduces network traffic, and keeps the data safe.
By using both Local Files and the Central Model, teams can work smoothly, stay connected, and avoid conflicts while working on the same project.
Below are the key differences between a Local File and a Central Model in Revit are as follows:
| Features | Central Model | Local File |
| Purpose | Serves as the main project file for all users. | Personal copy of the Central Model for individual users. |
| Storage Location | Stored in a shared network or cloud location. | Stored locally on the user’s computer. |
| Access | Accessible by all users in the project. | Accessed and edited by only one user at a time. |
| Data | Contains all project data, including worksets. | Contains user-specific data and temporary project changes. |
| Synchronisation | Changes are synchronised with Local Files when users update. | Synchronises periodically with the Central Model to update changes. |
| Performance | Can be slower for individual users, especially in large projects. | Improves performance by storing data locally for faster access. |
| Worksharing | Manages all users and their worksets. | Allows users to work on specific worksets and sync their updates. |
| Offline Capability | Requires network access for all changes. | Can be worked on offline and synced when reconnected. |
| Conflict Management | Central location for resolving conflicts. | Reduces the risk of data conflicts as each user works on their Local File. |
| Data Integrity | Maintains the integrity of the project. | Periodic syncing ensures the Local File is in sync with the Central Model. |
Ready to simplify your projects and achieve the benefits?
BIM ASSOCIATES is your one-stop BIM Solution provider for Revit Architectural and Structural Solutions. They coordinate with your team to develop, record, and streamline the BIM Revit Model, along with the sheets, Bill of Quantities, Bill of Materials, and clash coordination.
Knowing the difference between a Local File and the Central Model sets the stage for putting that understanding into action. To work effectively in a shared environment, it’s important to start with the correct setup.
Steps to Create a Local File from the Central Model in Revit
Creating a Local File from the Central Model in Revit is essential when working in a team. It gives each person their copy of the project to work on while still staying connected to the main file. This means users can make changes, manage their worksets, and work more smoothly—without slowing down the system.
Even though each person works separately, they can sync their changes with the Central Model to keep everything up to date and in one place. This helps the whole team stay organised and work together efficiently.
Below are the key steps to create a Local File from the Central Model in Revit:
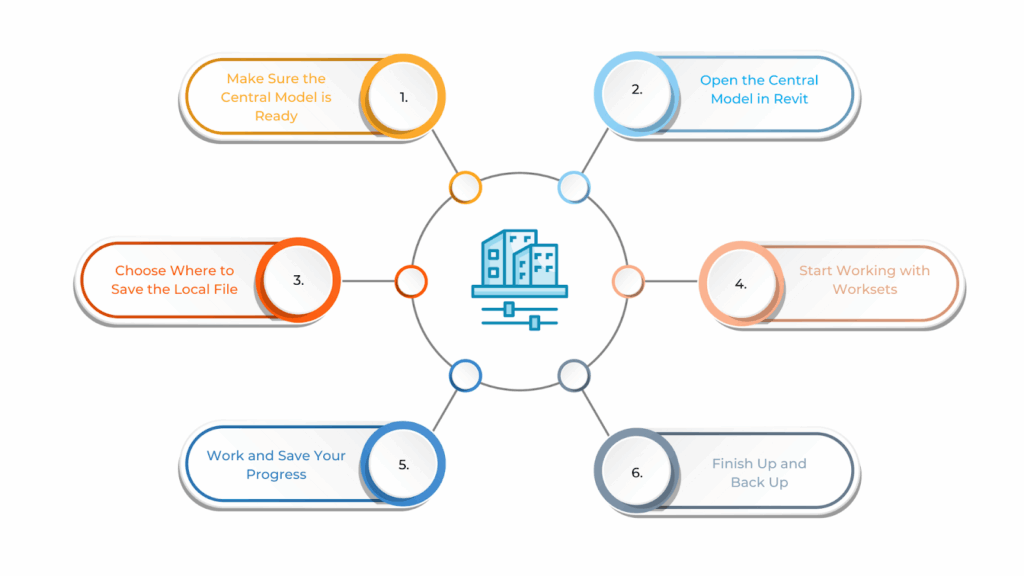
- Make Sure the Central Model is Ready
Before creating a Local File, ensure the Central Model is saved properly in a shared location, such as a network drive or a cloud folder. Also, check that you have the right permissions to access and work on the file.
- Open the Central Model in Revit
Open Revit and go to the “Open” menu. Find and select the Central Model from its saved location. In the Open dialog box, check the option that says “Create New Local.” This ensures Revit will create your personal Local File when the model opens.
- Choose Where to Save the Local File
Revit will ask you where to save the Local File on your computer. Choose a folder that is easy to find and clearly named. Creating a separate folder just for Local Files is a good idea. Also, renaming the file to include your name or initials allows easy identification like “ProjectName_Anna.rvt.”
- Start Working with Worksets
When the Local File opens, Revit will assign worksets to you. This allows you to focus on your part of the project without interfering with other team members’ work. Before you begin working, synchronise your file with the Central Model to ensure you have the latest updates.
- Work and Save Your Progress
You can now begin working in your Local File. Revit will automatically save your changes as you go, but it’s still a good idea to manually save from time to time. Use the “Synchronise with Central” option regularly to upload your updates and receive changes made by others.
- Finish Up and Back Up
When you’re done working, synchronise your Local File one last time with the Central Model to ensure all your changes are saved and then close the file. It’s also a good habit to back up your Local File occasionally in case something goes wrong or the file gets corrupted.
By taking these steps, you can create and manage a Local File in Revit the right way, helping your team work together smoothly and keep the project moving efficiently. After the Local File is set up, it’s important to understand how to use and maintain it properly in a team environment.
Managing Local Files in a Team Environment
Managing Local Files in a team is key to running Revit projects smoothly. Since each team member works on their own copy of the project, it’s crucial to follow clear steps for creating, saving, and syncing these files.
Proper Local File management helps keep the team organised, reduces the risk of data loss or version conflicts, and ensures everyone works with the most up-to-date information. This leads to better collaboration and a more efficient workflow.
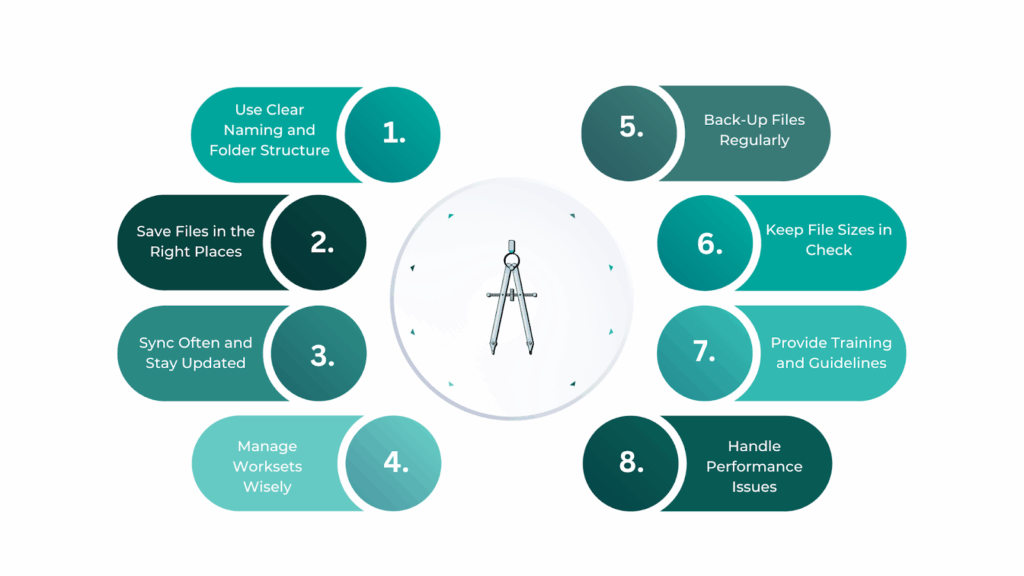
Below is a simple guide to managing Local Files in a team environment:
Use Clear Naming and Folder Structure
It’s essential to use a consistent naming system for Local Files. A common method is to include the project name and the user’s initials, like ProjectName_AB_Local.rvt. In addition, ensure each team member saves their Local File in a clearly labelled folder, separate from the Central Model.
Save Files in the Right Places
Local Files should be stored on the user’s computer or a designated network folder. Avoid using general cloud storage services that aren’t optimised for performance, as they can slow things down.
The Central Model should be saved in a shared location, like a network drive or BIM cloud platform, so everyone can easily access and sync without problems.
Sync Often and Stay Updated
Team members should sync their Local Files with the Central Model at the beginning of their work session and before closing Revit for the day. They should also use the “Reload Latest” option to bring in changes made by others.
If there are any syncing conflicts, clear communication within the team is key to solving them without causing data issues.
Manage Worksets Wisely
Everyone should work only on their assigned worksets to avoid overlapping or accidental changes. Worksets divide the project into parts, like architecture or MEP-F, so team members can focus on their area. It’s also helpful to clearly communicate who is working on what—this can be done during team meetings or noted inside Revit.
Back-Up Files Regularly
It’s a good habit for team members to back up their Local Files regularly. This protects their work if something goes wrong, like a corrupted file or accidental deletion. While Revit’s AutoSave helps prevent loss, it’s still wise to manually save backups occasionally.
Keep File Sizes in Check
As the project grows, Local Files can become large and decrease performance. Users should monitor file sizes and remove any extra or unnecessary data. Revit also has tools like “Compact and Repair” that help shrink the file size and keep it running smoothly.
Provide Training and Guidelines
All team members should be trained in managing Local Files properly, such as creating, syncing, and backing them up. Creating a simple document with all the rules and best practices is also helpful so team members can refer to it when needed.
Handle Performance Issues
If users experience slow performance, it may be due to heavy Local Files. In such cases, clean-up is necessary, or the project may need to be split into smaller models. Also, ensure every team member uses a computer that meets Revit’s hardware requirements. The right hardware can make a big difference in speed and user experience.
By following this guide, teams can ensure that Local Files are adequately managed, which helps maintain project integrity, reduces errors, and boosts collaboration efficiency.
Working with Local Files in a team setting requires more than just saving and syncing regularly—it involves coordination, discipline, and a shared understanding of how files are used. This is where best practices come into play.
Best Practices for Working with Local Files in Revit
Working with Local Files in Revit is essential for smooth teamwork on large projects involving multiple people. It’s helpful to follow some simple best practices to keep everything running well.
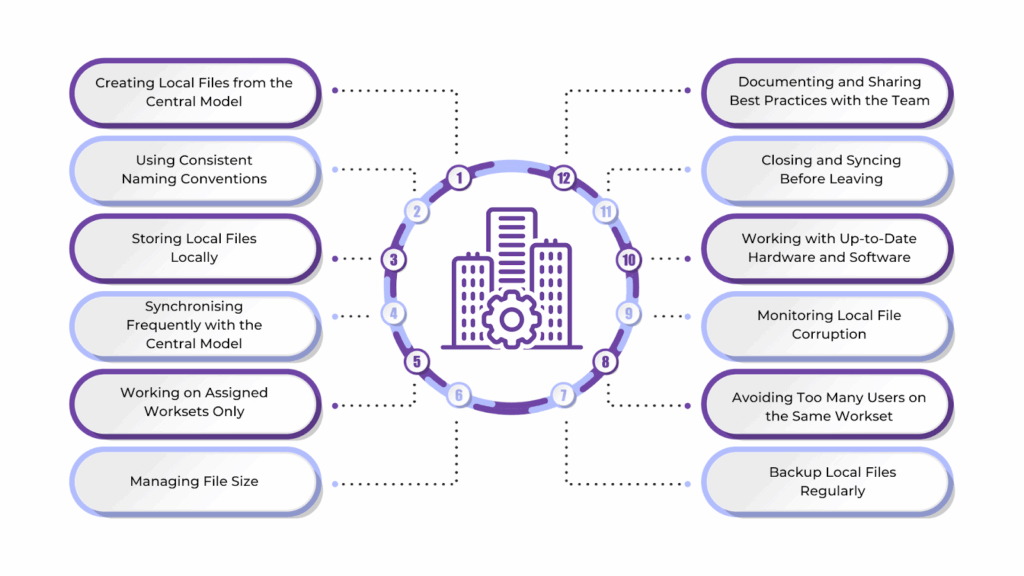
These steps help prevent data problems, keep the team aligned, and make sure the project stays well-organised. Good management of Local Files also improves performance and helps the team work more efficiently and stay productive. The best practices include:
Creating Local Files from the Central Model
Always start by creating your Local File from the Central Model. This ensures your file stays properly linked to the main project and works correctly with team updates. Use the “Create New Local” option when opening the Central Model so Revit can generate a new Local File for your session.
Using Consistent Naming Conventions
Give your Local File a clear and consistent name. A good format is to include the project name and your initials, like “ProjectName_YourName_Local.rvt.” This helps everyone easily find their file and keeps things organised across the team.
Storing Local Files Locally
Save your Local File on your computer or a specific local network folder. Avoid saving it to shared drives or cloud folders that aren’t designed for Revit, as that can slow things down and cause syncing problems.
Synchronising Frequently with the Central Model
Make it a habit to sync your Local File with the Central Model often—at the start and end of your work session. Use the “Synchronise with Central” feature to share your changes and get updates from others. Also, use “Reload Latest” regularly to keep your file current.
Working on Assigned Worksets Only
Stick to the worksets assigned to you. This keeps team members from accidentally changing each other’s work. Ensure everyone knows which parts of the model they’re responsible for, and communicate clearly to avoid overlap.
Managing File Size
Check your Local File size regularly. Large files can slow down your work. Clean out unused elements or families and use Revit’s “Compact and Repair” tools to keep your file running smoothly.
Backup Local Files Regularly
Even though Revit has autosave, you should still back up your Local File often—especially on big projects. Having a recent backup helps in case the file gets corrupted or lost.
Avoiding Too Many Users on the Same Workset
Limit how many people work on the same workset at once. Too much activity on a single section can lead to syncing delays and file conflicts. Break the project into smaller worksets so everyone can work independently.
Monitoring Local File Corruption
Watch for signs of file corruption, like errors or unusual behaviour. If your Local File starts acting up, it’s best to delete it and create a new one from the Central Model. Always resolve sync warnings quickly to avoid bigger problems.
Working with Up-to-Date Hardware and Software
Ensure your computer meets Revit’s system needs—enough RAM, a high-speed processor, and a quality graphics card make a big difference. Also, keep Revit updated so you get the latest fixes and performance improvements.
Closing and Syncing Before Leaving
Before closing Revit for the day, always sync your Local File with the Central Model. This ensures that your work is saved and shared and that the Central Model is ready for others to use.
Documenting and Sharing Best Practices with the Team
Share these guidelines with your team so everyone is on the same page. Consider writing down your project’s best practices and update them as it grows. This helps keep the whole team working smoothly together.
BIM Supports GREEN EARTH.
Conclusion
Local files are a big part of smooth teamwork in Revit. They let each team member work on their copy of the model while still staying connected to the Central Model. This helps avoid clashes, keeps the work moving quickly, and makes it easier for everyone to do their part without slowing others down.
When local files are well-managed—synced often, clearly named, and kept tidy—it helps the whole team stay organised and focused. It also keeps the project safer and more up-to-date. Following these simple habits makes working on big, shared projects easier.
Are you looking for BIM solutions?
BIM ASSOCIATES is your one-stop BIM Solution provider for the Architecture and Structure discipline. Their solutions help clients with better decision-making, cost-saving, efficient construction planning, and green earth initiatives.
You might also like: How to Download and Install Revit on macOS: Solutions & M2 Performance.
FAQs (Frequently Asked Questions)
1. How do I detach a Local File from Central Revit?
To detach a Local File from the Central Model, go to the “Open” dialog in Revit, find the Central Model, and check the “Detach from Central” option. This creates an independent file that’s no longer linked to the Central Model, which is useful for backups or testing without affecting the main project.
2. What is Workset in Revit?
A Workset in Revit is like a section of the project that users can work on separately. It allows multiple team members to work on different parts of the model at the same time without interfering with each other’s work. Worksets help organise large projects and improve collaboration in team environments.
3. How do I recover a local Revit file?
To recover a Local File, first check Revit’s backup folder or the Local File location for automatic backups (.0001.rvt, .0002.rvt, etc.). You can open the most recent one to restore your work. If that doesn’t work, create a new Local File from the Central Model and manually copy over any needed changes.